
A desktop app that helps find clues in aerial footage both post-flight and as it is being live-streamed from the drone.
Get for Mac/Windows
Quick start guide
Common questions
NO LONGER UPDATED
🗄️ Legacy FAQ: this answer is about Eagle Eyes Scan, our previous desktop app, and is kept here for teams still using Scan. Scan has been replaced by Eagle Eyes Mirada. See What is Eagle Eyes Mirada?
Contents
→ Activation instructions for Eagle Eyes Scan 1.1.2 and up
→ Activation instructions for Eagle Eyes Scan 0.5.3
Activation instructions for Eagle Eyes Scan 1.1.2 and up
Follow the activation instructions as shown in the first few minutes of this video:
Activation instructions for Eagle Eyes Scan 0.5.3
To activate your Eagle Eyes License for Eagle Eyes Scan on your laptop follow the instructions outlined in this video:
Please note:
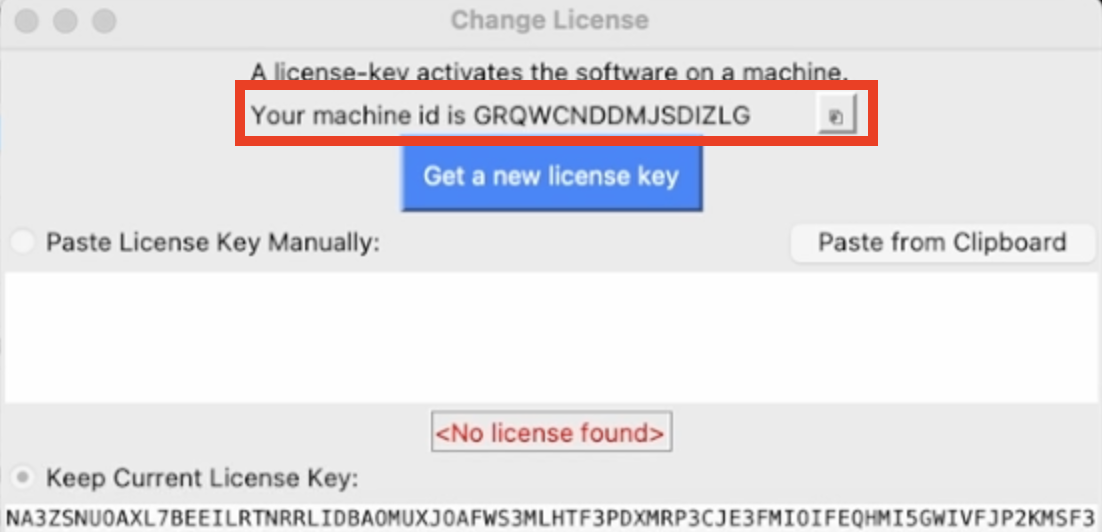
Screenshot from Scan license activation window:
Screenshot from the licensing flow on the Eagle Eyes account page:
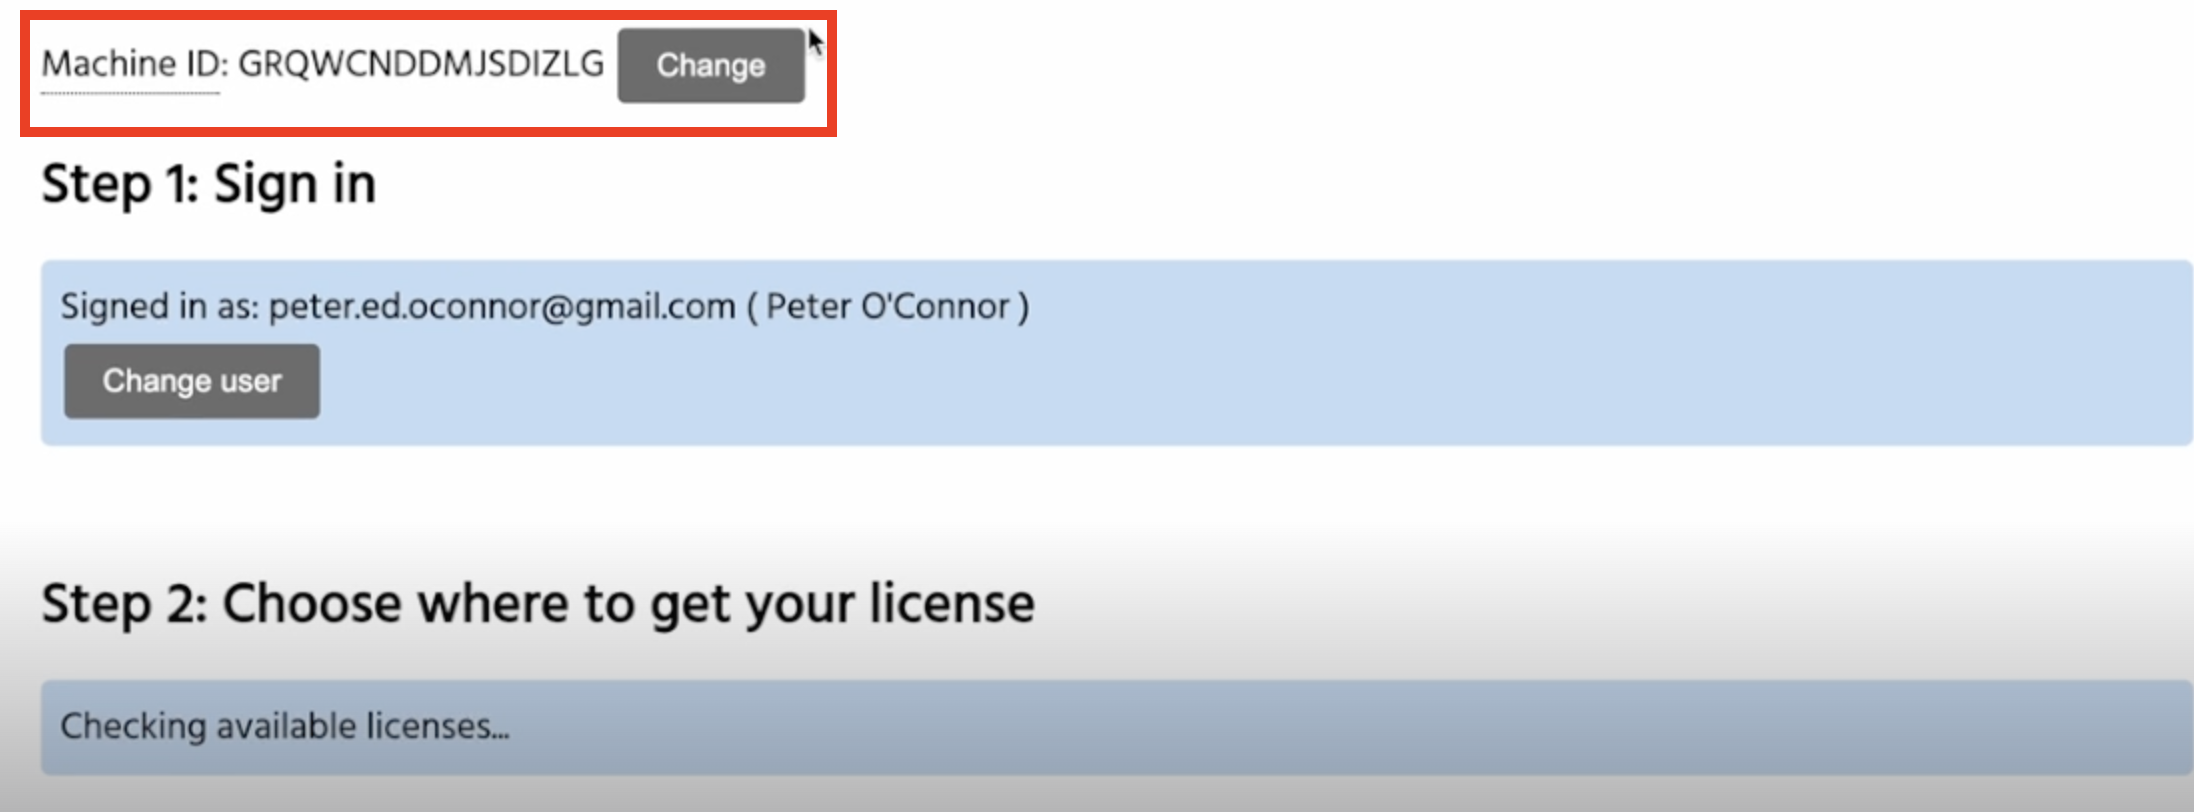
At the bottom of the license activation web page, copy the resulting key (200+ characters) back into Scan via "paste from clipboard".
For more information see the Eagle Eyes Scan user manual.
The Eagle Eyes computer vision system enables real-time detections on your live drone feed. This means you can look back over areas you've flown and review all the images that triggered a detection helping hone in on clues identifying things that might otherwise be overlooked. The detector can be run on recorded footage from any drone, any image or any video file. For more information on how the detector works, see here.
The intended way to review detections after the fact is by running the detector on recorded footage in Eagle Eyes Mirada. Load your imagery, run the detector, then open the Mosaic view: every detection appears as a thumbnail, sorted by confidence, time, or color, so the most promising clues surface first. Click any thumbnail to inspect the full frame, and bookmark anything worth a second look with a single keystroke (press B). Bookmarks and detections can be uploaded to your CalTopo map or included in a PDF report.
Detections are leads, not necessarily conclusions: Mirada puts candidate clues in front of a human, it doesn't decide for you.
Running the Eagle Eyes detector and reviewing detections in Mirada.
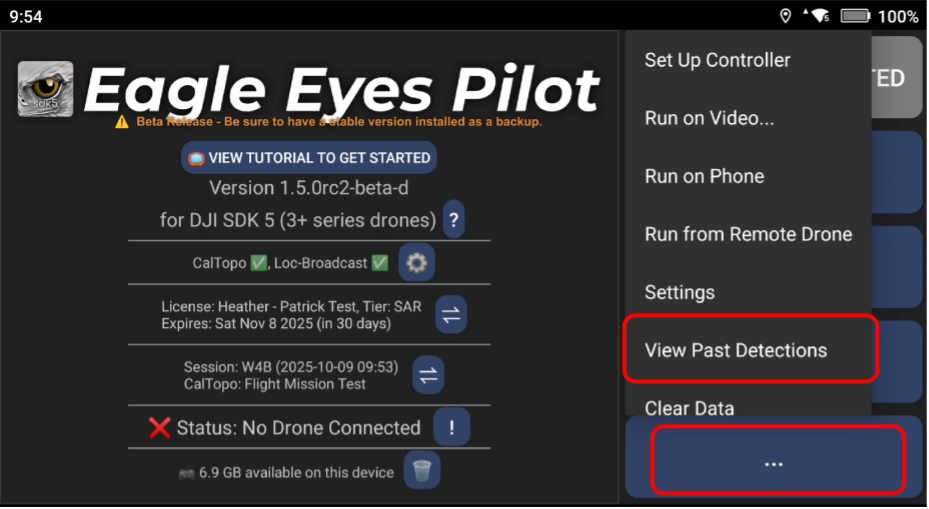
It is also possible to review past detections directly in Eagle Eyes Pilot, although this is not the recommended workflow. To do this, either tap the three dots (⋯) button on the bottom right of the main landing screen in Eagle Eyes Pilot. Then select View Past Detections:
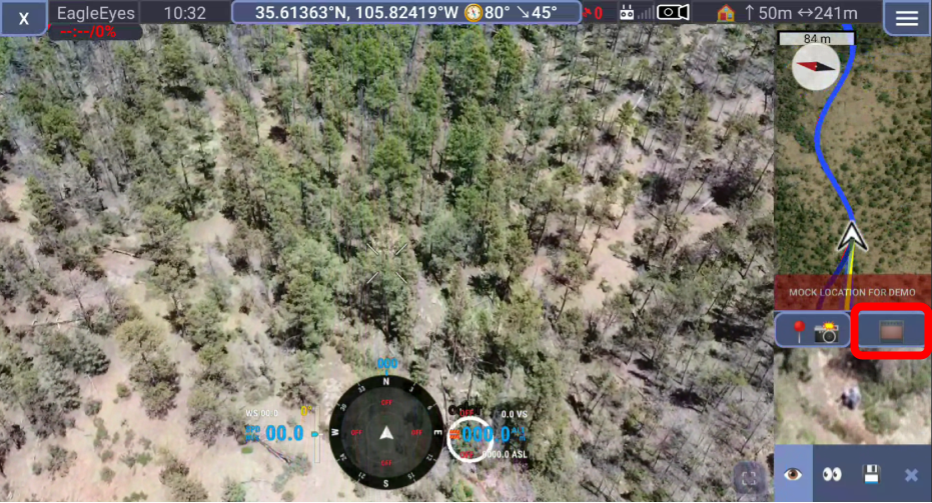
Or access the detections view from within the piloting screen by long-pressing the film roll icon next to the camera photo point marker button:
That will bring you to the detections page in Eagle Eyes Pilot:
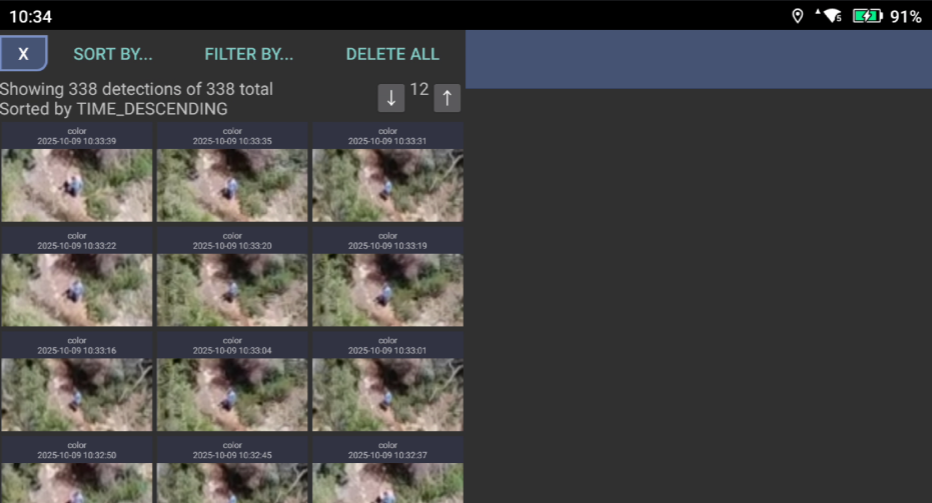
From the detections page, you can filter results by session or remove all filters to display all detections stored on your device from previous flights.
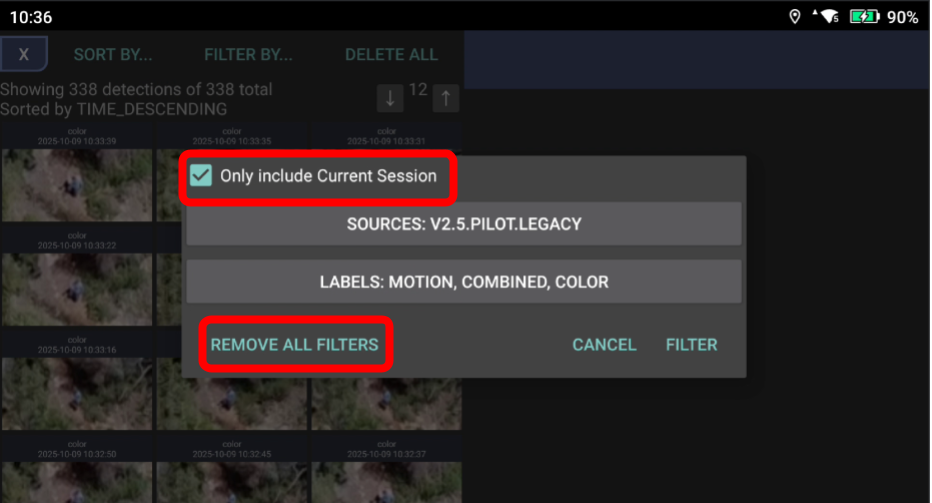
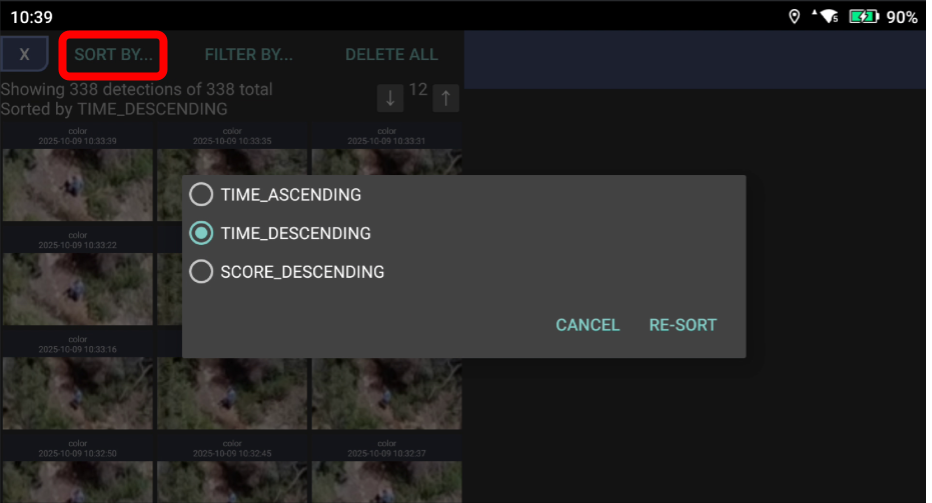
Note that filtering detections by session will reset if you shut down the app and restart. Detections can also be sorted by time and detection score.
Again, while detection review in Eagle Eyes Pilot is available, the recommended workflow for reviewing, analyzing, and exporting detections remains through Eagle Eyes Mirada on desktop. Development is underway to expand and improve in-app review options in future releases.
The following video shows how to toggle the on-screen display overlays on and off in both DJI Pilot 2 and Eagle Eyes Pilot to get a clean HDMI output, for feeding into Eagle Eyes Mirada or an external monitor.
In DJI Pilot 2:
In Eagle Eyes Pilot:
When Clean HDMI Output is enabled, the video signal coming from your RC Pro controller will be free of any on-screen display elements, giving you a pure video feed ready for use in Eagle Eyes Mirada or any HDMI display setup.
Eagle Eyes Mirada shows the coordinates for each of the detections. The coordinates shown correspond to the drone's position at the time the image associated with each detection was captured.
How you access these coordinates depends on how your data is being ingested:
Processing recorded DJI MP4 files:
If you're processing MP4 files from DJI drones, make sure "Subtitle" recording is turned on in DJI Pilot 2 (as shown below). This creates .SRT files alongside the video. Import your footage into Eagle Eyes Mirada with "+" → Load Folder or Sync from SD Card and Mirada automatically pairs each .SRT with its video: this enables per-frame GPS coordinates. (If you import individual files with Load Files, select both the MP4 and the matching SRT.) Some newer models, like the Matrice 4 series, embed the telemetry inside the MP4 file instead: Mirada reads that directly, no .SRT needed (see Matrice 4 series geolocation).
This video shows our previous desktop app, Eagle Eyes Scan, which has been replaced by Mirada. The DJI Pilot 2 caption settings are unchanged, and the same import steps apply in Mirada.
Running live detection over HDMI:
If you're running live detection via an HDMI cable, run Eagle Eyes Pilot on the drone controller and make sure your laptop and the controller are on the same Wi-Fi network. This allows Eagle Eyes Mirada to pick up live drone coordinates during the livestream.
This video shows Eagle Eyes Pilot with our previous desktop app, Eagle Eyes Scan. The setup works the same with Mirada.
Here is how loading drone data into Mirada looks, with metadata and coordinates read automatically:
Loading data into Mirada.
Drones without telemetry files: Eagle Eyes Mirada does not yet support importing separate flight records (such as CSV flight logs) to add coordinates to videos that were recorded without telemetry.
In the end, you should see the coordinates for each detection, and clicking them lets you copy the coordinates in various formats.
Visit our comprehensive FAQ page for all questions and answers.
View All FAQs